
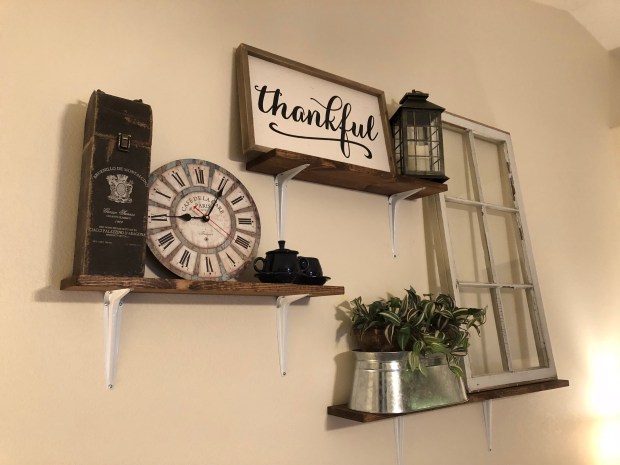
I stared at the blank wall in our apartment for weeks before deciding what to do with it. Maybe mount a large clock? Hang picture frames? All the solutions I came up with seemed cliché or expensive. After much brainstorming, I decided upon a design that would become one of the most time-heavy projects Mason and I constructed for our apartment. But it also turned out to be the most beloved project. I wanted to share a few of the steps we went through to construct the shelving that will hopefully inspire you in your DIY endeavors.
Step 1: Have a vision. Before I purchased anything, I drew up dimensions and thought through every product I would need. I also thought through placement of the shelves in an asymmetrical arrangement. One of the problems with DIY is that we get a project in our head but don’t realize how many resources are needed to do-it-ourselves. In the end, we end up spending more time AND money than we would have just going to IKEA or Walmart. Make sure this doesn’t happen with your next project.
Step 2: Buy the products. I scoured Lowe’s lumber section for exactly the right size and material before purchasing anything. I only wish I had done as much comparison with the screws I selected. Foolishly, I thought the visible part was most important, but it turns out that the smallest parts can be the most important (more on that later). I also selected the cute white brackets, stain, and sanding material I needed. Lowe’s cut the wood to my precise dimensions. All in all, I don’t think I spent more than $40, and I have used the stain and sanding material multiple times since then. That is cheaper than any other quality product I found online.
Step 3: Prepare the materials. I spent a good amount of time carefully sanding and staining the wood for assembly. For more information about how to do this correctly, check out this article, 7 Tips for Staining Wood. I also had the screws carefully labeled and counted. If any of the prep work is done poorly, you will reap the consequences later.
Step 4: Assemble the project. Mason so graciously helped me mount the shelves. After 18 nail hole attempts to find a stud (it turns out that wall was a fire wall and had much thicker drywall than normal), we finally found a stud and began to screw each piece into place. It didn’t take Mason long to realize that I had purchased flat head screws instead of Phillips head screws. I didn’t think that was a big deal. In hindsight, we should have stopped right there and gone to purchase the right screws. But instead, Mason persevered like a champ through many agonizing hours of trying to drill those stupid things in. All in all, we made memories and ended up with beautiful shelves. But that goes to show that every project will have its kinks.
If you are considering a DIY project for your home, I highly recommend it. But do the research first! Know what you need, be realistic, and set aside plenty of time to get it done. You will likely end up with a beautiful piece with a personal touch.
